"A friend is what the heart needs all the time"
Henry Van Dyke


Wednesday, November 20, 2013

November card club

This month our club kit was from Joni.  It was full of so many goodies from washi tape, which I mostly saved for later, to die cuts and great stamped sayings.  The kit was perfect as I really needed to start working on my Christmas cards.  This year I am going to go outside my comfort zone and send everyone different cards.  Well maybe not all different but everyone will not be getting the same card this year.  Not after you see what I did with the kit.

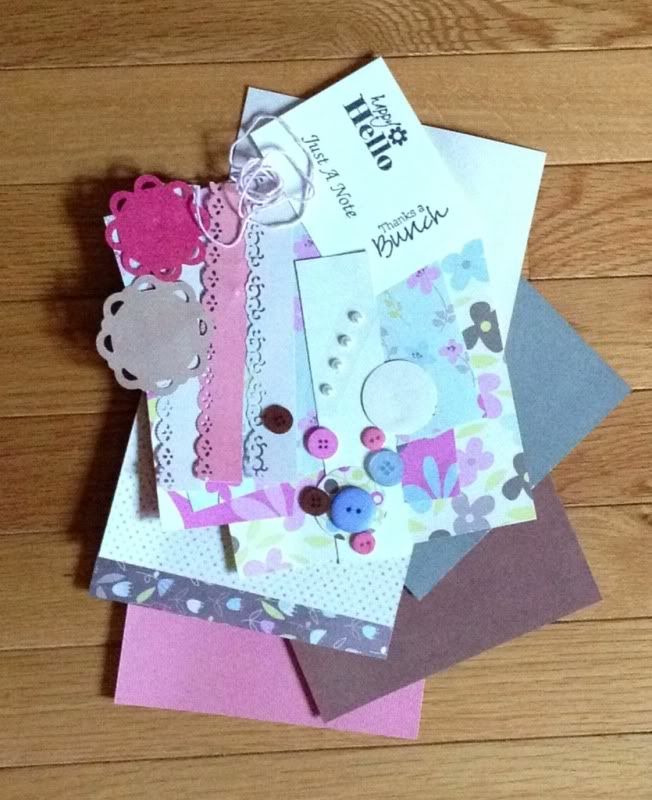
So here is the kit Joni sent us


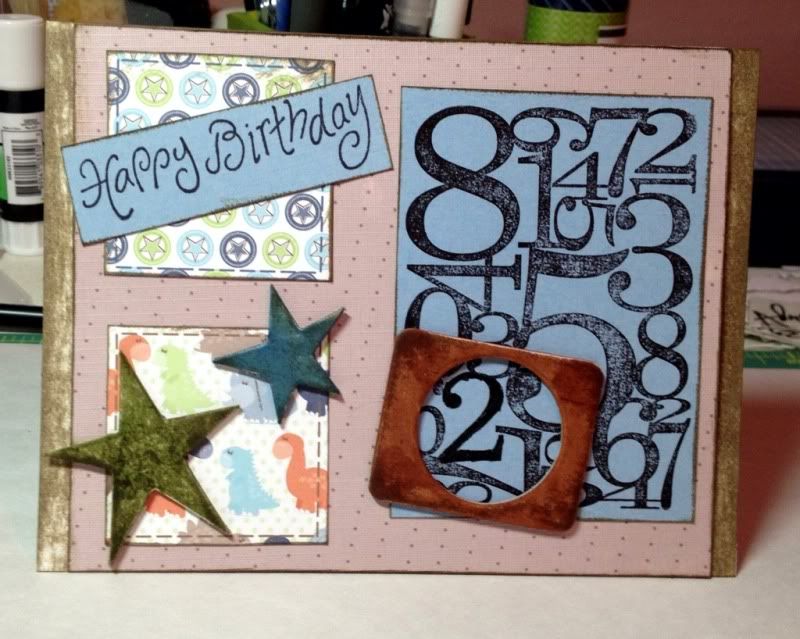
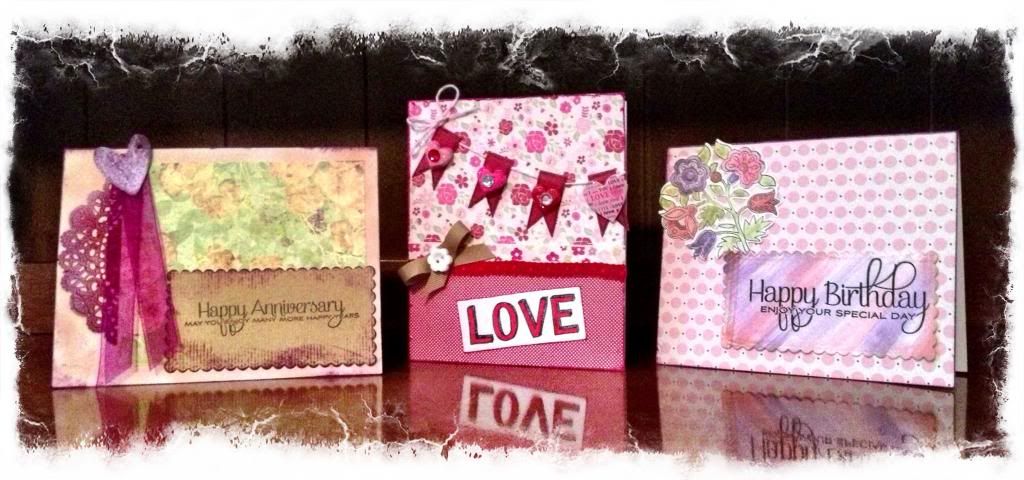
And here are the cards


Here they are individually:

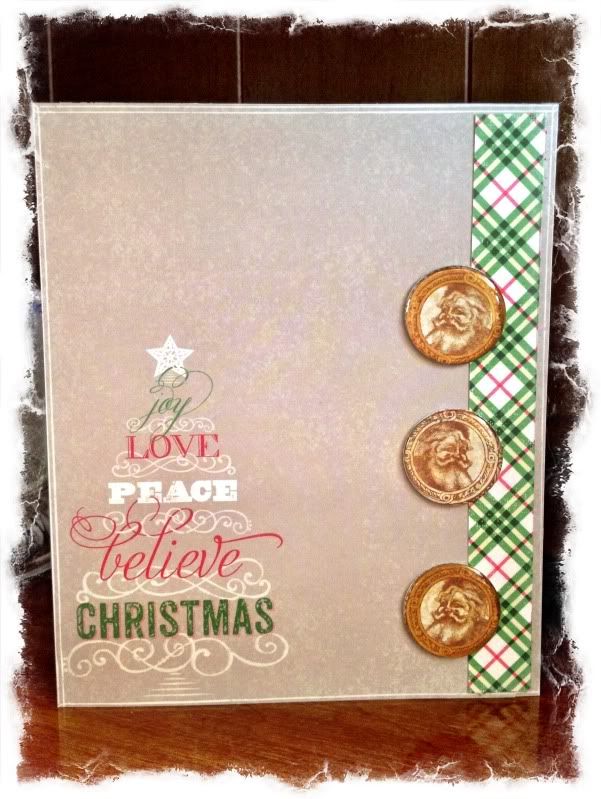
The paper on this one was perfect all by itself I really didn't want to distract from the pattern.  Because the paper was 6 x 6 it of course was not long enough to cover the card in it's entirety.  So I took a scrap piece and put that along the side.  I also used my new Ephipany tool to create those adorable Santa heads.   I made the image extra large so you can get the full effect.


On this one I liked the paper as well.  So I added the border that Joni punched out along the bottom of the card and then a little above that put a small strip of black cardstock with the Merry Christmas washi tape just below.  This kept it lined up nicely.  The little deer was part of the kit as was the tree.  The christmas tree I covered with distress glitter and then dotted some stickles to make the different colored ornaments.  I used a sparkle pen on all of the black to outline but it didn't show up in my picture.


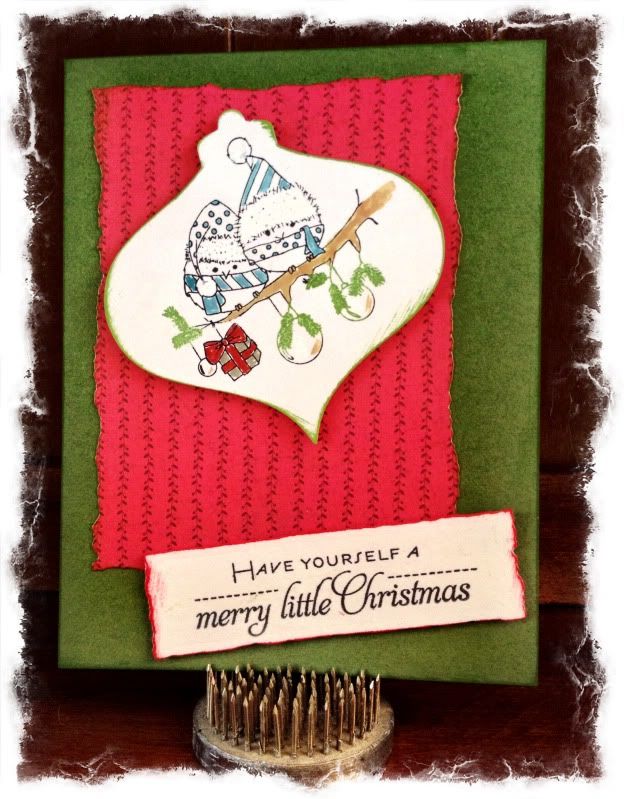
For the last one of this set I used some of my Spellbinder dies to cut out an ornament which I then stamped a cute little image from Unity that I just purchased.  How adorable are they!  I colored them in with my distress markers.  The patterned paper from the kit along with the saying in the corner I used another Spellbinder die that is distressed.  And you know how I love things that are distressed.  


This next one frustrated me.  The die was in the kit and Joni embossed the white design.  I stamped the Merry Christmas but used a distress pad which was a mistake.  I thought I had it all off the die and stamped it again with versamark.  When I put the embossing powder on the die I realized my error.  I removed as much of the powder as I could but the image is not crisp at all.  I like to think that it looks like it is snowing.  Again because the paper is 6 x 6 I used a piece that was trimmed off the bottom to continue to the end of the card and to hide that seam I used another border that Joni sent in the kit.  I then put the pretty poinsettia's at the bottom and done!


Here are the final two:

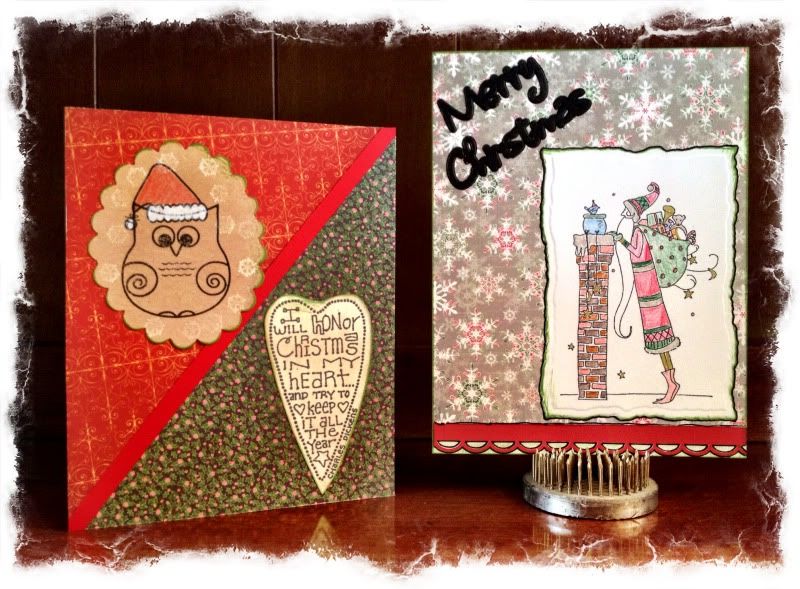
On this card I used a stamp I purchased online of an owl isn't he cute!  The white on his hat is a distress marker, picket fence, doesn't it work well?  Then I cut a piece of the paper from the kit on an angle.  Shall I tell you I messed that up too?  I found a piece of paper in my stash that looked good alongside this one so cut that on an angle.  How could I make the same mistake twice you ask? You bet I did lol.  I fixed my little mistake with a piece of red solid cardstock that I put down then trimmed the ends so that I didn't mess that up.  The saying was in the kit.


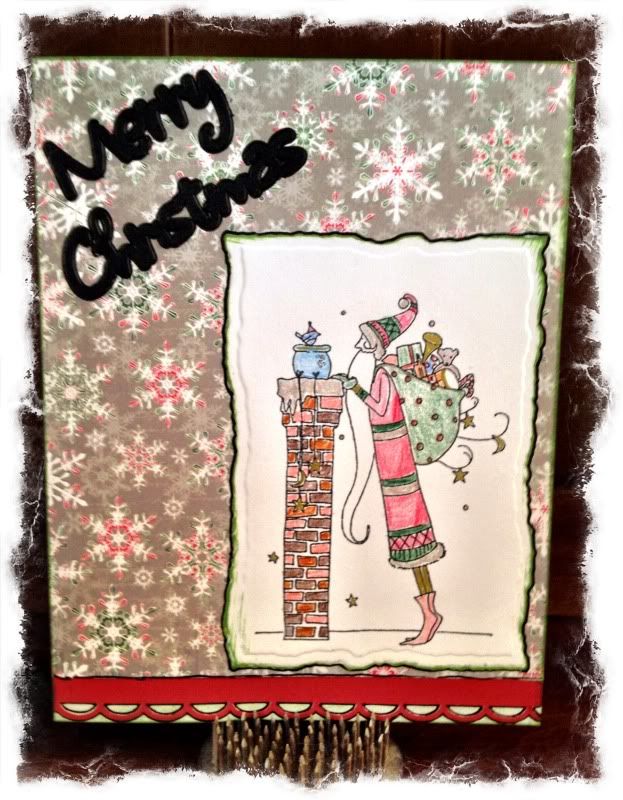
I saved my favorite for last.  This adorable Santa image was in our kit.  I colored him with colored pencils then used some gold stickles in spots, which doesn't show in the picture, which added such a nice little glow then diecut it with the distressed Spellbinders die.  I used the border at the bottom of the card after using some red distress ink on my card base so it wasn't so white.  The Merry Christmas die cut was also in the kit and I simply outlined it and the Santa image with my favorite black pen which I bought at the Scarlet Lime store.

 I hope you enjoyed my cards from this month and I thank you for stopping by.

Until next time!

Terri


Saturday, August 31, 2013

Hi everyone and thanks for visiting my blog.
Today I need to get something off my chest so here goes.
Back in July I was so excited to find the perfect table and chairs at JCP during a lunch break.  I purchased them on the spot and got a really great deal or at least I thought so.
With the first delivery I discovered not only a table that was damaged but the incorrect chairs.  The chairs were leather and I have 4 cats.  We all know what happens with leather and cats.  I was told by JCP furniture that I would need to purchase the correct chairs then once they were returned I would get a credit on my charge card.  Yes I was charged again for the chairs.  Why did I think this was going to be easy?
With the 2nd table, which was also damaged, I received the correct chairs.  I was elated now only if I could get a table that wasn't damaged.  Finally table #3 arrived a month and a half after the original delivery.  The table was good enough for my purposes.  Now I had the table and chairs that make my kitchen look bigger.
Now you say to yourself sounds good story over.  Not so.  I am not sure why I waited so long to double check my account but I thought that the statement I received at the beginning of August was too soon to see the credit.  I went online today and found that my account has not been credited yet.
I called their customer service number, which has one of those fun automated systems NOT, finally getting a live person.  She tells me I have the wrong department and sends me NOWHERE.  I have to dial back the number she gave me, just in case we get disconnected, only to go back into the same system.  This next rep was very nice and waited on the line until someone answered in furniture.  After more than 10 minutes he tells me that he will have to call me back either tonight by 6pm, not sure what time zone, or Monday morning at the latest as the person he needs to ask what to do is not there today.  Well good for that person you have nobody else you can ask?
I will wait for the outcome on Monday but am also expecting some type of compensation for all of this aggravation.  I don't think that is too much to ask.
How frustrating and believe me I would never recommend anyone to buy furniture from them ever.
Thanks for letting me vent.
Terri 

Friday, July 19, 2013

I was on vacation this week but it sure didn't feel like it.  I had to get all those annoying doctor appointments taken care of and of course they couldn't do it on the same day.  Then Bill's new condo took up last weekend, Monday I stopped over and Wednesday I stopped as well to drop off some last items.
Yesterday we had our friend the contractor come and start renovating Bill's old bedroom.  He was back today and finished up with the mudding of the drywall and then called me later to let me know he found a closet door for $10.  How awesome is that?

Today JCP came and delivered my new kitchen table.  It is walnut and oh so pretty.  Of course nothing goes smoothly the table has a broken bracket for the hidden leaf and the chairs are leather which of course I don't want due to the cats.

Here is before and after of my kitchen table area

Love all the cat toys right?
And here is the new set
Now we are going to change out the fan/light so that it is not dropped down so low.  It opens up the kitchen really nicely and with the leaf will fit more people than the round did with it's leaf.

Today started our online crop over at ScrappinMojo you should come check it out.  I had a blog lift as one of my challenges. I found this fabulous artist that speaks to my heart here Finnabair.  I believe she is affiliated with Prima and has some beautiful layouts/altered items on her blog.  Go check her out. 

From one of her layouts I created this

I had such fun creating this and yes that picture is over 10 years old lol.
Thanks for stopping by and again check out our online crop it is all week long!


Sunday, June 30, 2013

Happy June everyone....ok almost July.
I am late this month with my card club kit reveal and honestly I have no idea why.
Our kit this month was sent to us by KimP.  I just loved all the fun colors, I am partial to orange, and that cute little umbrella (wait until you see what I did with that).  Here is the kit


This first card I cut out the green fabric flowers and put them together at the top then used one of the sentiments she included.  Very simple design but I love it.


This next one I really liked the strip on the side so I added the pearls to them to draw your eye towards it.  I also tried out my new PanPastels on the camera.  They have a great texture and glide on so smoothly.  I added a few flowers from my stash to complete the look.


Kim included one of those really cute little umbrella's which I wanted to incorporate somehow.  I decided to take it apart and use it as a base for the orange flower in the kit.  I love how this turned out.  I added a sentiment from a new stamp set I found last weekend.


Last but certainly not least is this cute doll I made using some of the patterned paper in the kit.  I had just purchased this one and couldn't wait to see how she looked all decked out.  I love how she turned out and know she will look great on both a card or a canvas. I am not too sure why her photo is blurry though hmmm....


Thanks for stopping by and please check out the other ladies in our group they can be found at ScrappinMojo.


Sunday, May 19, 2013

I am so glad winter is over and summer is only a month (officially) away.  Everything is in full bloom and so pretty.

This month I provided the card kit but wanted to do something completely outside the box.  I had purchased the most adorable paper doll stamps and decided that I would send those out this month instead of our normal cards.  Here is a picture of the kit

I thought this was so cute!  Because I made a tag last month I thought how fun it would be to use these on canvas's just like She-Art by Christy T.  I used an 8 x 8 canvas which she fit on perfectly.  This was already started previously when I had too much paint out that I didn't want to waste so I had grabbed this canvas with a stencil making the green in the center.  I then just added my paper doll after painting her hair and skin the used some stamps to fill in the rest.  Here it is:

And a close up:


This next one I put my paper doll on the tag then put the tag on the canvas.  This canvas is bigger and I painted the background and tag with some acrylic paints that I found on sale at Hobby Lobby yesterday.  I then adhered some older brads that are shaped like flowers and a dragonfly then drew the stems, leaves and flying trail with a pen.  I added some fun paper that I found at HL to the corner as the colors were a perfect match.  I love how this came out it is so bright and cheerful.

Here are some close-ups:
I decided to make one more to show how versatile these paper dolls could be:

How cute is that book cover!

I hope you enjoyed this months reveal.  Make sure to stop over at ScrappinMojo to see what the other ladies came up with.

Thanks and see you next month!


Sunday, April 21, 2013

This month Mara provided us with our card kit.  The colors really reminded me of spring and oh so girly with all the pinks/flowers.  Here is a picture


My great nephew's 2nd birthday was yesterday and I saw a really cute idea on Pinterest.  I didn't have the exact items needed but I think I like my version better.  I used one of the patterned papers from the kit and the rest came from my stash.


Yesterday I received my order from Bluemoon Scrapbooking with these adorable stamps by Julie Nutting.  I saw these on our message board and fell in love.  So for my next item I went totally outside the box.  Instead of a card I made a tag using the border stamps, tag pad and one of the girls.  I stamped her on paper from my stash then used what was in the kit to dress her.  I absolutely love how she turned out.


I hope you enjoyed my reveal this month.  Make sure to stop by ScrappinMojo to check out everyone's cards. 

See you next month!


Wednesday, March 20, 2013

Spring is in the air well maybe not here but some place not too far away. I bring up spring as that is what the kit that Mary sent us reminded me of. So many cute things that I will save for a rainy day. Today I had to not only create these cards but start getting my things together for my vacation that starts on Friday. The kit worked beautifully for both the birthday card for my brother in law and also the anniversary card for my dad.

This is the kit Mary sent us.


Here are my cards for this months card club kit.


First is the birthday card. I used a new Tim Holtz mini cupcake stamp which I stamped twice. I cut out the cupcake, colored it and used pop dots to make it stand out.  I also distressed all my edges then used distress ink to make everything pop off the brown and blue background.


My final card I used the PTI anniversary stamp. This is becoming a favorite. I topped it off with the hearts Mary included in the kit but I inked them a really pretty brighter fuchsia.  It was very hard for me not to distress this card as well but I wanted a softer feel.


 I hope you enjoyed my cards this month. Remember to go visit the other blogs to check out what everyone has created.

Beth
Diane
Mary
Niki
Mara
Joni

The other ladies can be found at scrappinmojo .

Thanks for stopping by!

Wednesday, February 20, 2013

A new year is upon us and with that comes change.  Our card club group has expanded and in order to accommodate  everyone we will be sharing our reveal not only on our blogs but also on our card club forum on Scrappinmojo.com.  Make sure to stop by to check out everyone's great creations.  It is always so much fun to see how everyone uses the product given by that month's hostess.  We are such a diverse group that there are no two alike. 
We do however seem to 'pin' the same things on Pinterest.
So without further ado here is my reveal.
Our hostess this month was Beth and she sent such a cute kit to work with.


These are my three cards that I made I will share each individually so you can see them close up.


This first card I used mostly the supplies that Beth sent.  Both patterned papers, the red ribbon, the pink string, the heart and flower embellies along with the love stamp.  I colored the love stamp with my copics, added some banners and the pink heart from an old collection.  The ribbon just above the red ribbon was in my stash.  I couldn't believe how well it matched the paper on top.  I tied a bow with some ribbon from my stash and topped it off with a flower button from the kit.  I really love how this turned out and think I will save it for my anniversary card this year.

I decided to use some paper from my stash for this next card.  It was one of the newer Prima pads that I had purchased not long ago.  I colored a doily and heart tag in the upper corner with my copic airbrush system to match the darker purple color in the paper.  I stamped the anniversary saying and then used a newer die to cut it out.  Of course the whole thing is edged with some Distress ink.  You know how I love anything distress.

The last card I used some of the paper that was in the kit along with the Happy Birthday stamped sentiment.  I water colored the Happy Birthday with my Distress markers and the water brush all from Tim Holtz.  I really liked how this turned out it is nice and muted which matches the paper perfectly.  I then water colored a stamped image I had made earlier from a new PTI collection I purchased.  It was the perfect finishing touch to this very soft looking birthday card.  It is intended for my girlfriend whose birthday is next week.  Shhh...don't tell.

I hope you enjoyed all of my cards this month.  Remember to come take a peek over at http://www.scrappinmojo.com/forum/index.php

Thank you for looking.

Terri

Here are the other blogs for the other ladies but remember not everyone is going to be listed here.

Beth
Diane
Mary
Niki
Mara
Joni